Are you having cross-contamination issues with your dip liquids? Your brush could be the biggest culprit that's causing your frustration.
If you're unsure whether you've inadvertently turned your at-home manicure workspace into a cross-contamination station, check the following ugh-inducing scenarios:
- Hardened brushes
- Thick, goopy liquids
- Bottles stuck shut
- Stained brushes
- Splitting brushes
- Liquids solidifying
...including splotchy nails despite waiting the indicated drying times and wiping down the nails fully!
All these dip mani nightmares should not be normalized as just part of dipping. This guide is meant to help you extend the life of your brushes and liquids — and give you beautiful dip nails every single time — because that's totally doable.
Why cross-contamination happens
You must be wondering why cross-contamination occurs even if you think you're ever so careful and take your time when doing your dip manicure.
Many things can cause it.
According to Sine, Licensed Cosmetologist and DipWell's Community Educator, "Cross-contamination can happen from acetone getting in the bottles during cleaning, brush cleaner on the brushes, filing debris, residual dip along with the step one reacting to the base brush, activator reacting to the sealer."
It may even be a result of the dipping products' overexposure to air for long periods.
She explained, “It’s because the bottle is not sealing properly due to product buildup in the ridges or the Base or Sealer has been left open during the application process.”
So if you had a couple of ruined brushes and bottles and are looking for solutions, here are our best recommendations to keep cross-contamination at bay.
How to prevent cross-contamination
All your cross-contamination frustrations stop here! Let's up your dipping game, so you can finally sort out your brush situation and finish your dip liquids down to the bottom.
Before dip application
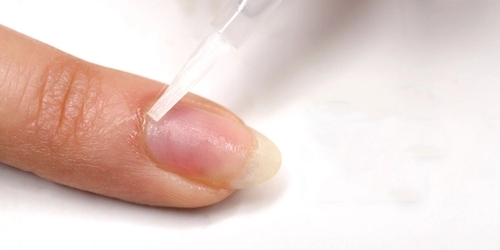
Nail prep is a super important part of your dip mani. Don't rush through it.
After filing and buffing your nails, be sure to clean the nail surface from any filing debris either by rinsing your hands or using a lint-free wipe saturated in alcohol. Some dippers also recommend washing your hands with Dawn dish soap. Just remember not to use soaps or cleansers that have any oils, emollients, or moisturizers in them.
Why shouldn't you skip this step? Doing this will avoid the debris from adhering to the brush and thus prevent contaminating the dip liquid in the bottle. (Double down on preventing cross-contamination by cleaning your hands again after applying and drying the Activator, just before applying the Sealer.)
Finally, before you start your dip powder mani, make sure your natural nail bed is 100% dry.
Get free dip nail help & tutorials every week!
Sign up for fresh nail inspo & exclusive discounts delivered right to your inbox!
By subscribing, you acknowledge our Privacy Policy.
During dip application
1. Allow enough drying time between the Bond and the Base dip liquids
If your Step 2 Base brush is clumping, it's most likely that your Step 1 Bond is not fully dry when you applied a coat of the Base dip nail liquid. And if your Base turned solid or its consistency is getting thick, it might have been contaminated because of the Bond that got transferred into the bottle when you reinserted the Base brush.
2. Use a fluffy brush to remove excess dip powder well before applying the next coat of dip liquid
Residual dip powder that gets on the brush can also cause a problem with the Base. That's why it's important to dust off any stray powder from the nail surface. If you don't, that dip powder will adhere to the brush and cause it to harden. Worst, it may also get transferred into the Base bottle and change its composition.
Rule of thumb: Get off excess powder whenever you use the brush over dip powder that could contaminate the dip liquid if it gets in the bottle. This helps combat the cross-contamination of your liquids which can cause problems with your application.
3. Don't let dip powder pigments stain the dipping nail liquid inside the bottle
Some higher pigmented nail dip powders can stain your brushes. After working on each nail or before putting the brush back in the bottle, simply clean it with a lint-free wipe. Otherwise, it may cause a funky color on your next mani.
4. Dry-wipe your nails with a lint-free cloth after applying the Activator and wait 3 to 5 minutes before applying the Sealer
FYI: Cotton with lint will cause a dip problem.
This step ensures you remove any excess Step 3 Activator that may still be on the nail surface (often invisible to the naked eye) and hasn't evaporated by the time users apply Step 4 Sealer.
And much like with the Bond and Base scenario (see number 1), the Activator should no longer be wet when you apply the Sealer. Or else, you could also end up with a hardened Sealer brush or gloppy Sealer dip nail liquid.
Lastly, don't forget to make sure your nails are clean and free from filing debris prior to applying the second coat of Activator.
5. When applying the first coat of Sealer, avoid heavily dragging the brush on the nail
If you don't, the bristles may pick up the Activator and harden your brush. Worst case, you may end up contaminating your entire Sealer bottle. Instead, lightly sweep the first coat of Sealer, and then apply the second coat with a normal amount to cover the entire nail.
6. Use the brush wiper inside the dip liquid bottle
During application, please be careful not to let the product drip on the neck and the rim of the bottle. When the liquid starts to dry around the thread of the bottle, it may seal the cap shut, making it difficult to open for future use.
In case you haven't noticed, there's a clear plastic piece in the bottle. This is a brush wiper. Before you pull the brush out of the bottle, try to wipe the side of your brush on the brush wiper. This will tremendously help in controlling the resin buildup on the threads and the top of the bottle.
From time to time, you may need to use a nipper to pull the softened product that built up on the grooves of the rim. 100% acetone will soften it enough so you can clean and pull off the glue buildup—just be careful not to get the acetone in the dip liquid.
7. Use the Brush Softener to fix dipping mishaps
Have you ever experienced mistakenly grabbing the bottle of Base instead of the Activator or vice versa? Or dipped your brush in the powder instead of the dip liquid bottle? If that happens again, instead of putting your brush back in the bottle, switch it with the Brush Softener and let it soak for a few hours. If you feel you want to clean it more, you can also give it a thorough cleansing with 91% alcohol. Make sure you wipe the brush well and remove the alcohol off prior to reinserting the brush into the dip liquid.
Get free tutorials, special deals every week!
Sign up for fresh nail inspo & exclusive discounts delivered right to your inbox.
By subscribing, you acknowledge our Privacy Policy.
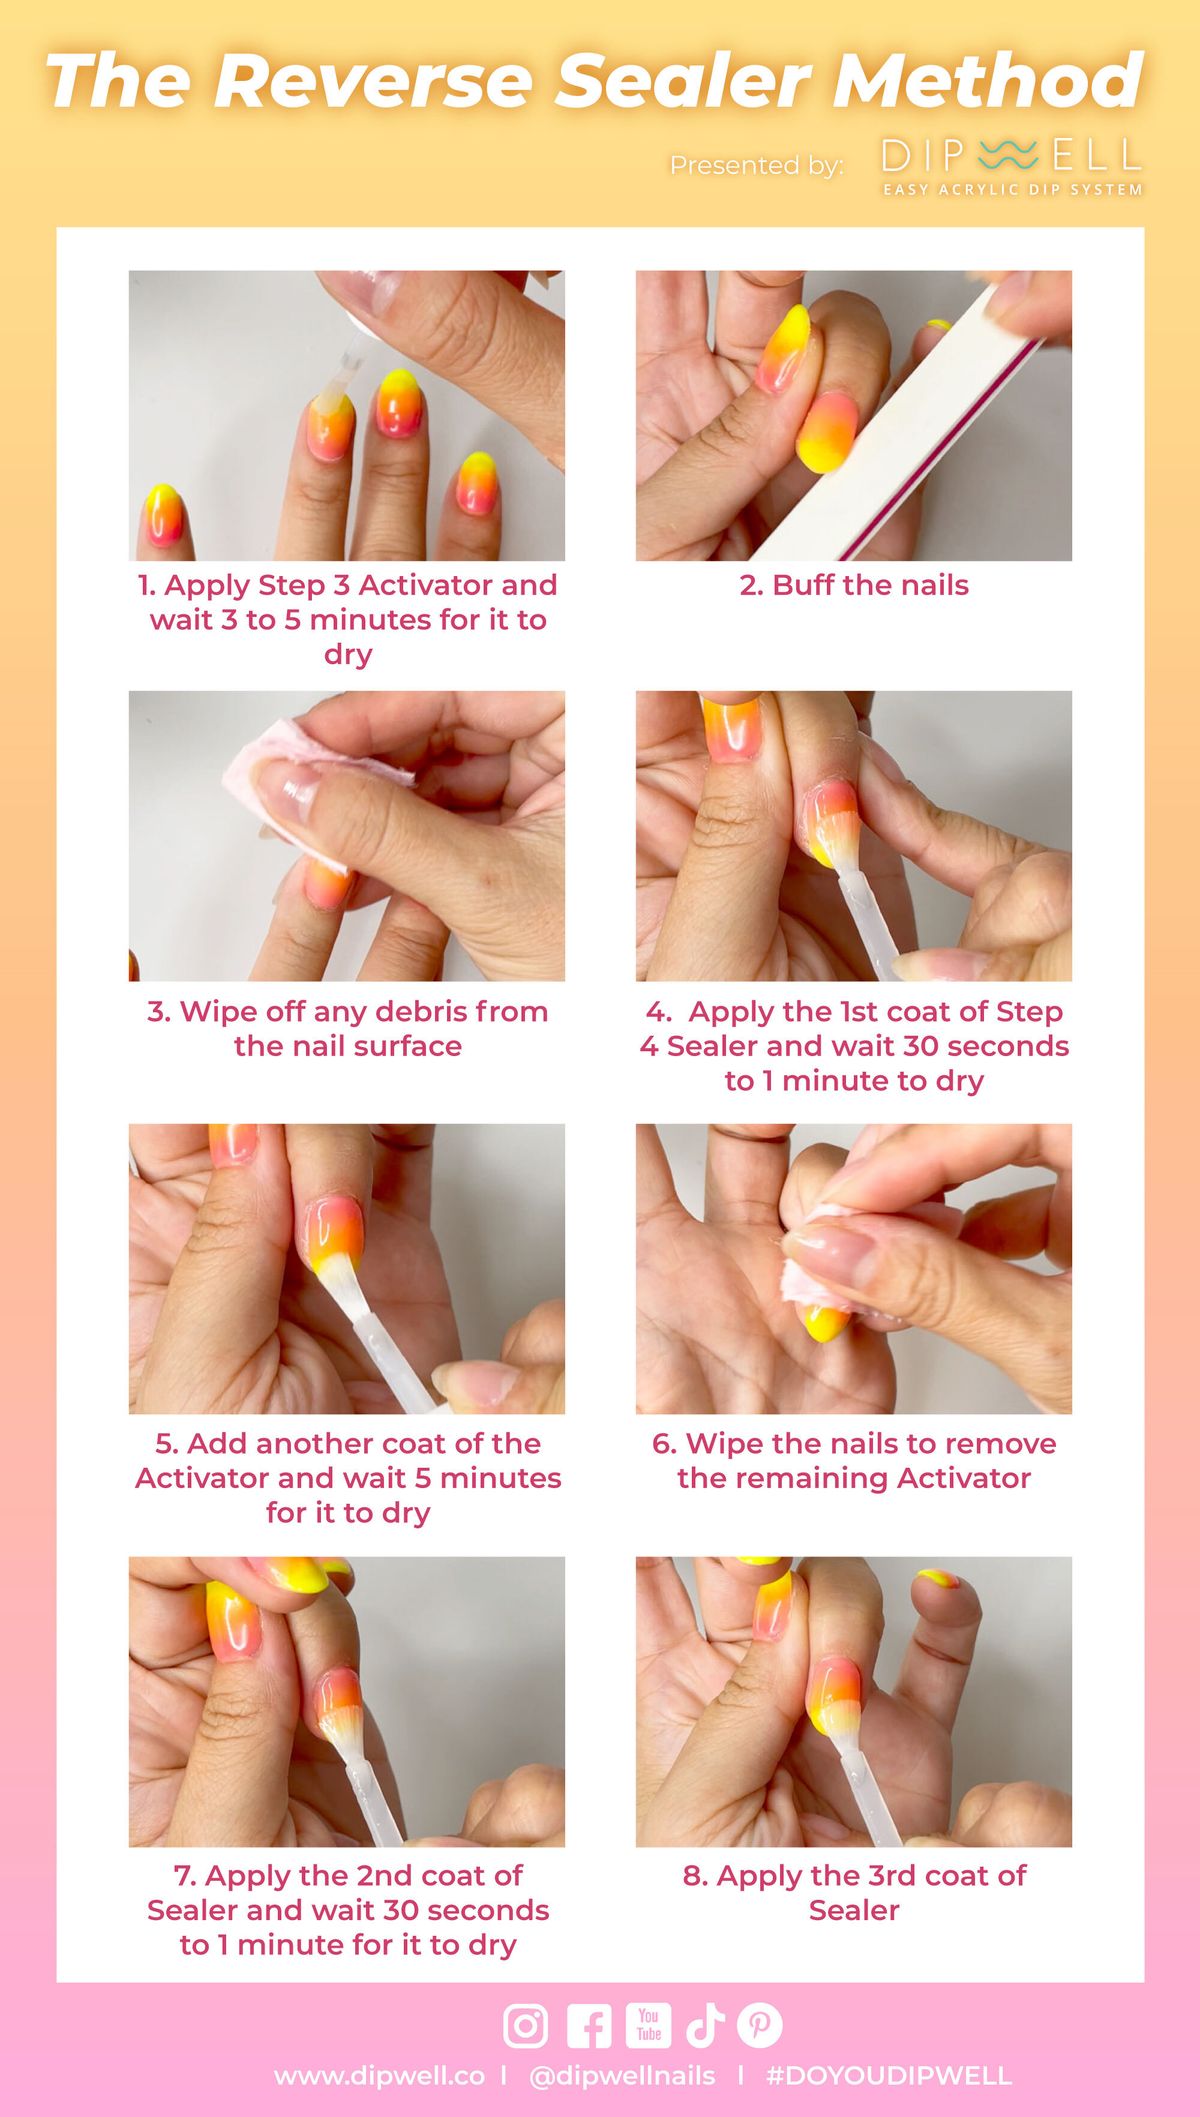
Alternative dip application: The Reverse Sealer Method
If the standard dipping method is giving you trouble, try this alternative. The Reverse Sealer Method not only gives you shinier and smoother dip nails — no imperfections or scratch marks from filing! — it also fixes your cross-contamination issues and frustrations.
Here's how it works:
1. Apply Step 3 Activator
2. Buff the nails
3. Wipe off any debris from the nail surface
4. Apply the first coat of Step 4 Sealer
5. Add another coat of the Activator and wait five minutes for it to dry
6. Wipe the nails to remove the remaining Activator
7. Apply the second and third coats of Sealer
DipWell's Dipper Club members agree: this method is a game changer!
If you've had problems with your Sealer — think getting ripples or the liquid not drying quite right — The Reverse Sealer Method is the solution that will give you consistent pretty results for sure. Just don't apply more than two consecutive coats of Sealer to avoid uneven drying and a gummy mani.
After dip application
These are the things you need to do to keep your brushes clean after a dip manicure. And since cross-contamination can also occur from the dip liquid's exposure to air, we've included some bottle care tips that will help preserve your brush and keep your dipping nail liquids from getting gunky, sealed shut, or hard as a rock. In short, you need to clean your brushes and shut and store your bottles the right way.
1. Be more diligent in cleaning off the brush before putting it back in the bottle
Brush contamination from residual powder and filing debris and cross-contamination between the products can be a problem. Each time your brush touches your nail, wipe it off on a lint-free cloth — without tugging on the bristles too hard — before reinserting it back in the bottle. This keeps your dip liquids in great condition so they don’t get gooey, gloppy, and unusable.
Do the same before using the brush softener. Too much product on the brushes when placing them in the softener will shorten the lifespan of the brush-saving liquid. Brush softener can contaminate the dip liquids, too. So make sure you wipe off all the softener before placing the brush back in its bottle. Otherwise, the excess brush softener will start breaking down the resins and deeming them unusable.
We also recommend letting the brushes soak in the softener for a minimum of 10 minutes. But the longer you soak the brushes, the better the result (as long as the brush saver still has life left in it).
2. Don’t clean the brushes with acetone or with soap & water. Ever.
Acetone will contaminate your dip liquid. Soap and water could ruin your brushes.
Like oil and vinegar, they do not mix.
If your brush softener is not working, you can use 91% alcohol instead. Then soak your brushes overnight.
Take note: A high ratio of broken down product to softener makes the brush saver less potent. If your brush softener has been used so often and is overloaded with resin, you need a fresh bottle.
3. Replacement brushes need to acclimate to the dip liquids for a few hours or overnight when possible
If your brush has gotten clumpy, you may switch brushes, but let it sit for a few hours or overnight.
To prevent cross-contamination during the swap, always be mindful to wipe the excess product off all replacement brushes and soak them in the brush softener before switching them out.
4. Close all your bottles properly
Simply put, the longevity of the liquids depends on whether they get cross-contaminated or exposed to air by not closing all the way because of a glue-like buildup on the rim.
After each use, be sure to clean the neck, rim and the inside of the brush cap. For cleaning, you can take the cuticle stick and wrap a nail wipe (with 100% acetone) around it. Just be careful not to get the acetone on the brush or in the dip liquid.
Then gently close the bottle all the way. Don't do it too tight that you'd need to be like The Hulk to open it. Leave a millimeter or two give.
5. Observe recommended storage practices
Make sure you are storing all your bottles in a cool, dark, dry place — upright and not laying down. Check out The Best Environment For Your Dip Mani article for the complete storage system to prevent your dip manicure products from getting ruined.
Make it a habit to keep your brushes and liquids as fresh as possible and slow down cross-contaminationIn a nutshell, it's all about prep and patience.
Waiting the appropriate times between steps is key. Use your phone or buy a timer if you need to. Make sure each layer is dry before applying the next liquid. Brush the excess powder or any debris off your nails between dips.
When it comes to DIY dip nails, practice makes perfect — along with dip nails tutorials and a supportive community. Are you a member of DipWell's exclusive group yet? Join the Dipper Club on Facebook. Post any dip dilemma that you have and learn many tips and techniques from all the helpful members. You can also find fellow dippers on Instagram via the official @dipwellnails and hashtag #DoYouDipWell.
Get free tutorials, special deals every week!
Sign up for fresh nail inspo & exclusive discounts delivered right to your inbox.
By subscribing, you acknowledge our Privacy Policy.