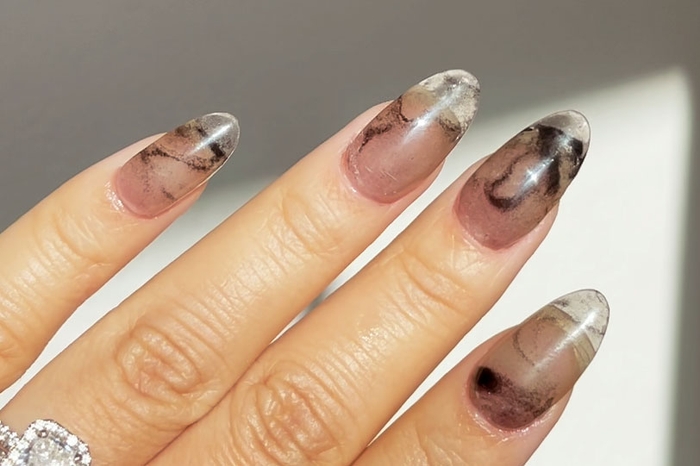
Smoky Gray Nails: Marbled Smoky Nail Art Made Easy

Difficulty
Easy
Time required
1 Hour
Salon price 
Est. $65 / Mani
DipWell price
Est. $4 / Mani
Step 1
- Apply a coat of Step 1 Bond and allow it to dry completely.
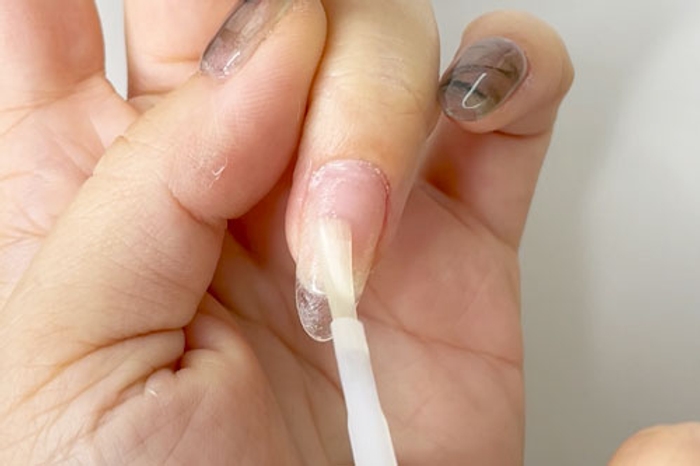
Step 2
- Apply a thin coat of Step 2 Base and immediately dip fingernail into Base & Finish powder.
PRO TIP: Avoid getting the product onto cuticles, powder will pick up wherever Base is applied.
Step 3
- Tap finger to remove loose powder. Follow by using a pointed tool, like a toothpick or Jelly Pusher, to clean around the cuticles. Then use a fluffy brush to sweep off any excess powder from the nail surface.
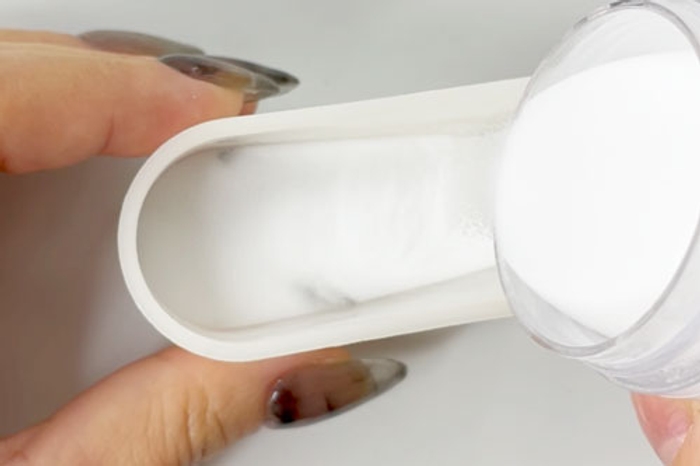
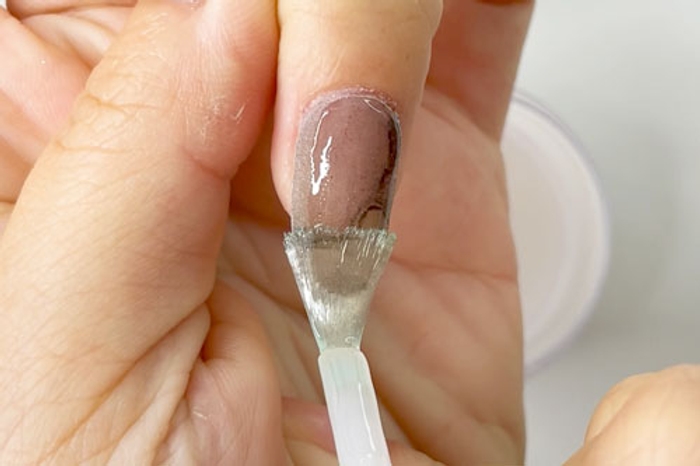
Step 4

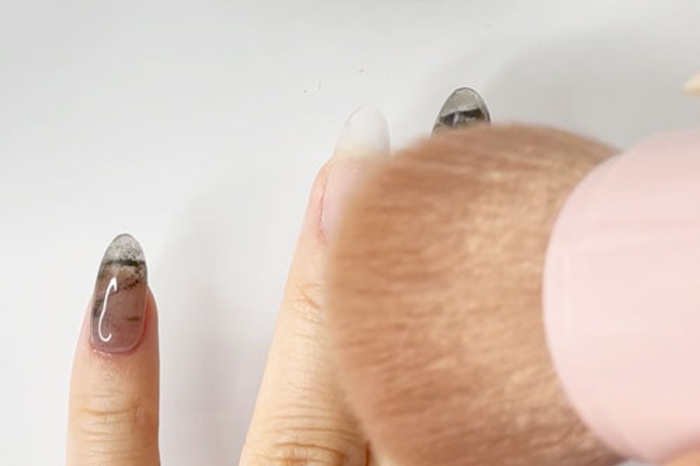
- Apply a second coat of Step 2 Base to the entire nail, and immediately dip fingernail into JL09.
PRO TIP: Brushes may harden or pick up color powder during application. Simply switch them between Brush Softener for easy cleaning & workability.
Get free tutorials every week!
Sign up for fresh nail inspo & exclusive discounts delivered right to your inbox
By subscribing, you acknowledge our Privacy Policy.
Step 5
- Tap finger to remove loose powder, then use a pointed tool, like a toothpick or Jelly Pusher, to clean around the cuticles. Use a fluffy brush to sweep off the excess powder from the nail surface.
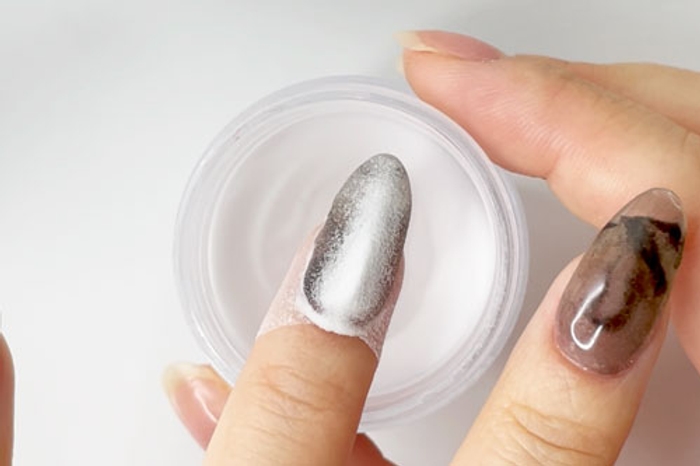
Step 6
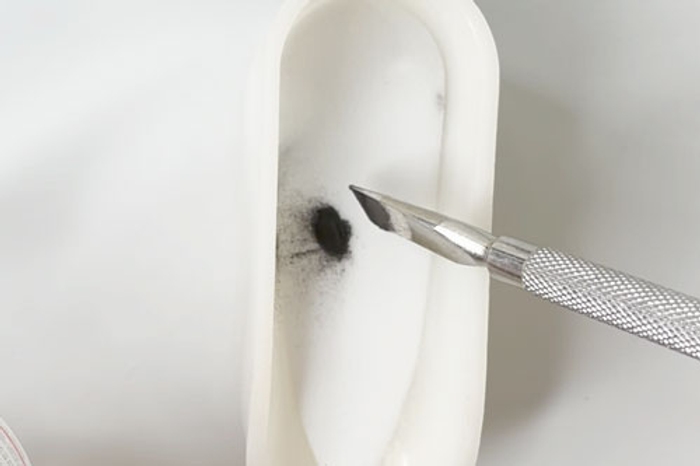

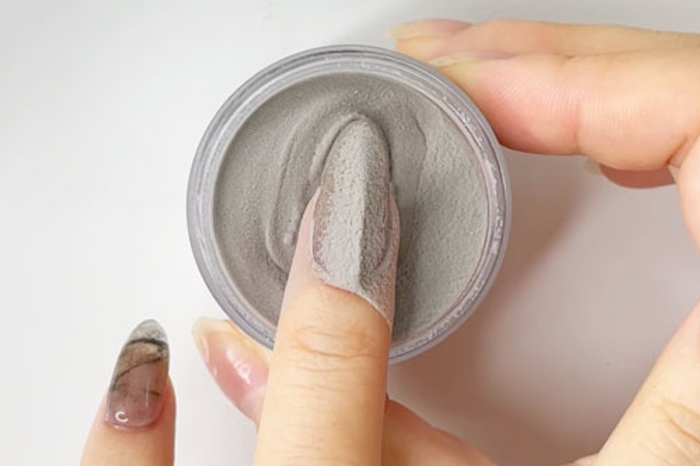
- In a shallow container, pour some Base & Finish powder. Add a couple small dollops of CL64.
- Using a pointed tool, gently swirl CL64 into the Base & Finish powder.
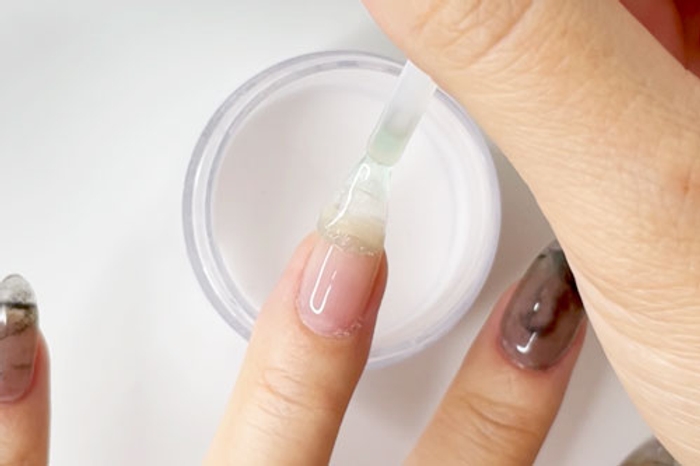
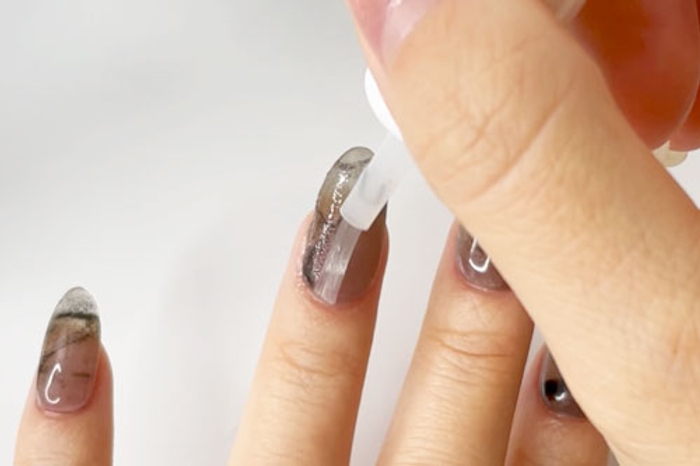
Step 7
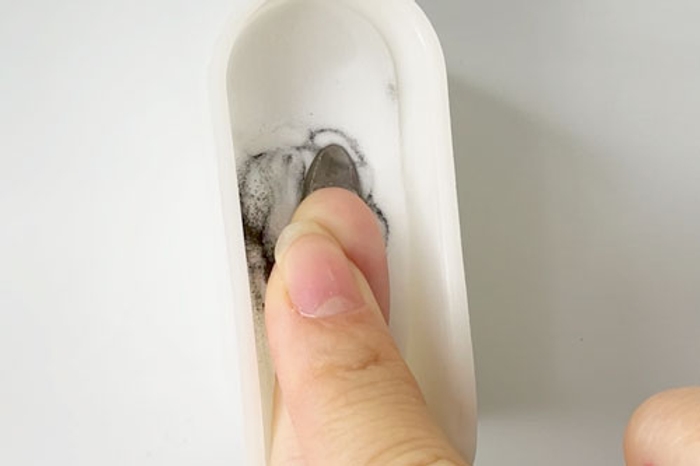
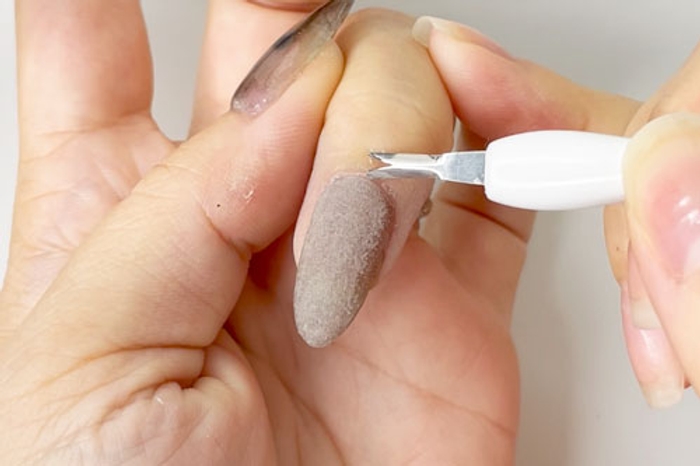
- Apply a coat of Step 2 Base to the entire nail, then gently lay the nail into the swirled dip powder.
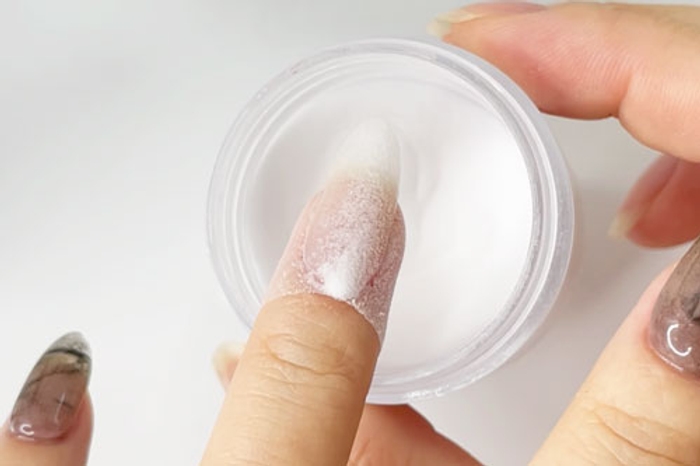
Step 8
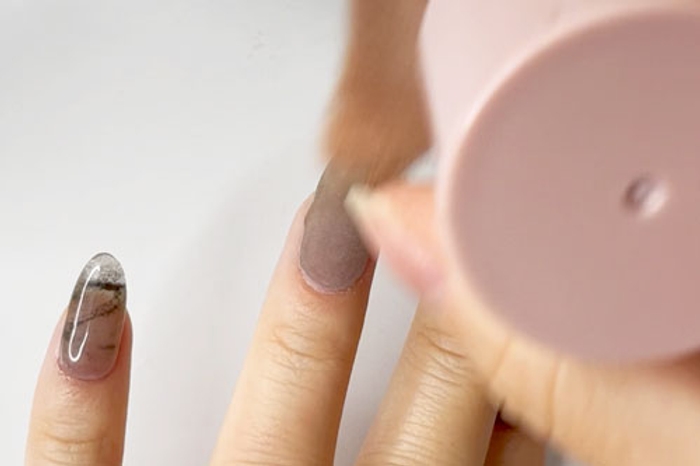
- Apply another thin coat of Step 2 Base to the entire nail and immediately dip into Base & Finish powder.
Step 9
- Apply Step 3 Activator to the entire nail, and allow a few minutes for the dip blend to harden.
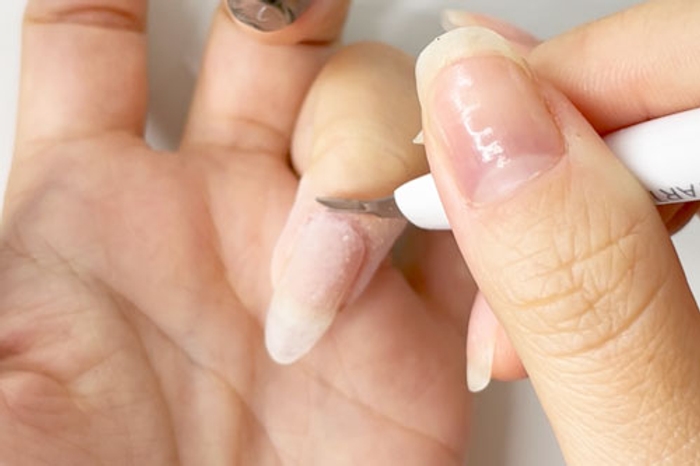
Step 10
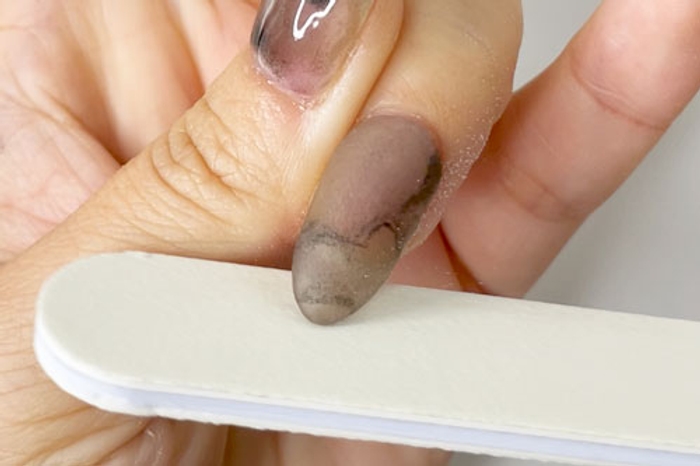
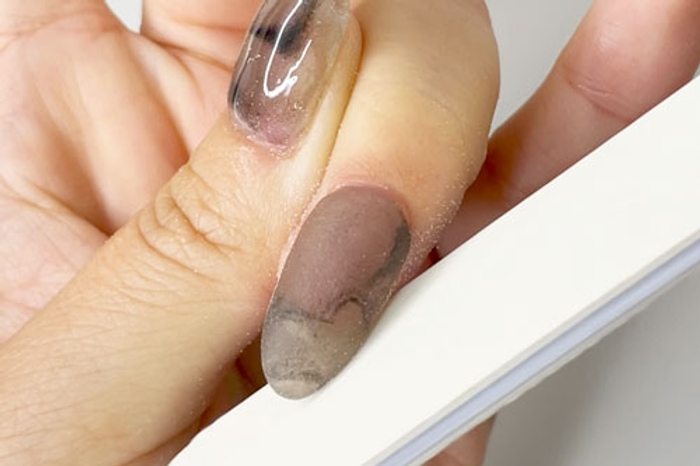
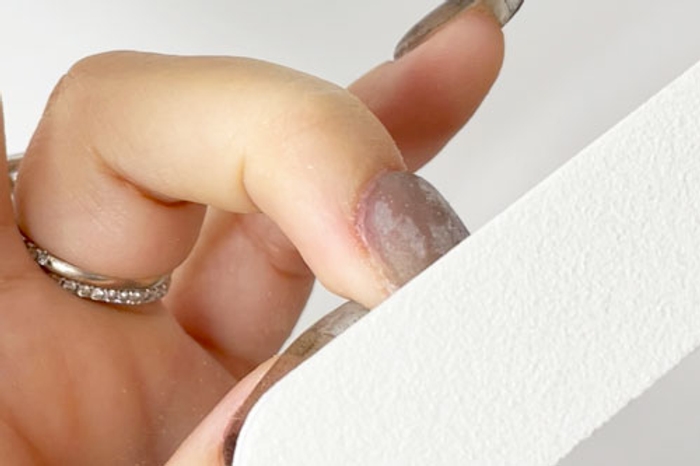
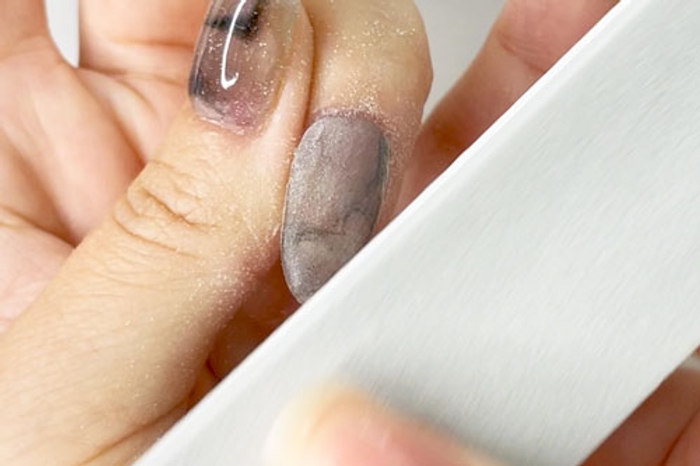
- File and buff nail to achieve desired nail shape and smoothness.
Step 11
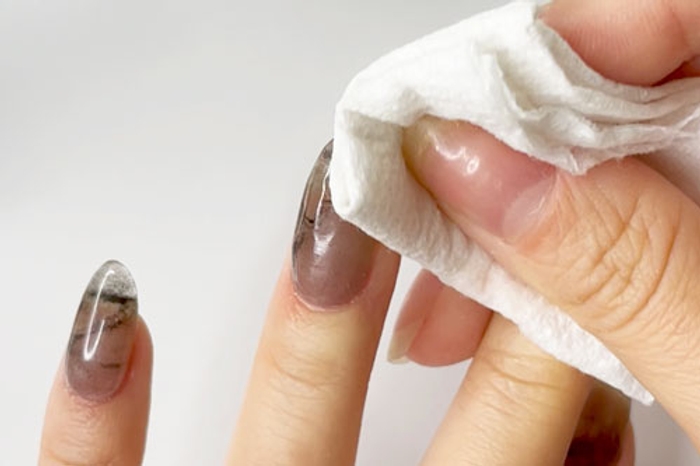
- Wash hands or use a lint-free wipe saturated in alcohol to wipe the nails clean from filing debris.
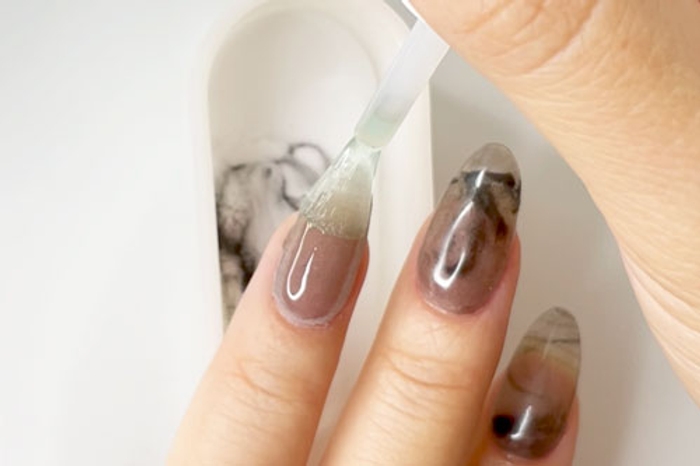
Step 12
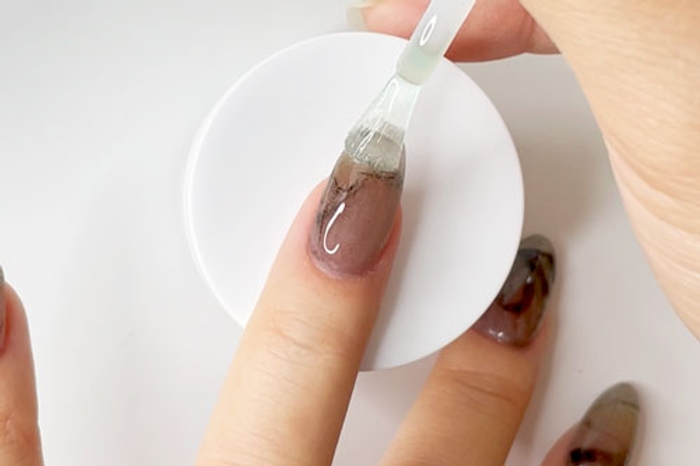
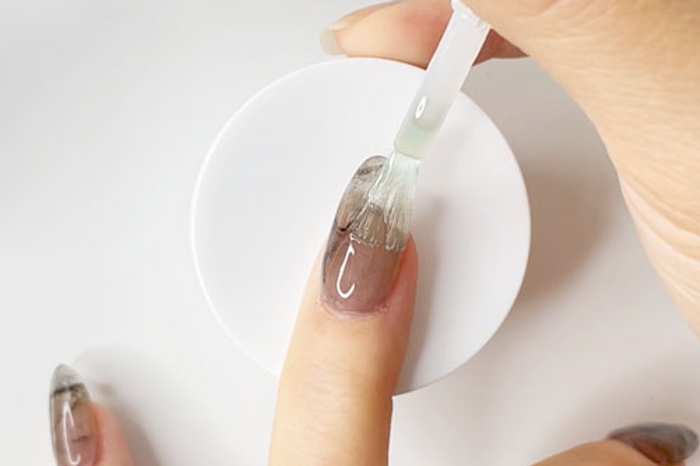
- Apply a coat of Step 4 Sealer to the entire nail and allow it to dry for 1-2 minutes.
Step 13
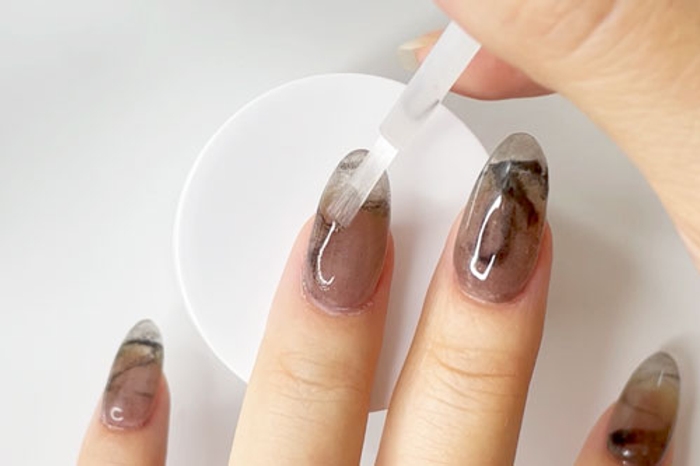
- Apply a second coat of Step 3 Activator and allow it to dry for 5 full minutes.
PRO TIP: If you live in a humid climate, you may need to increase your dry time.
Step 14
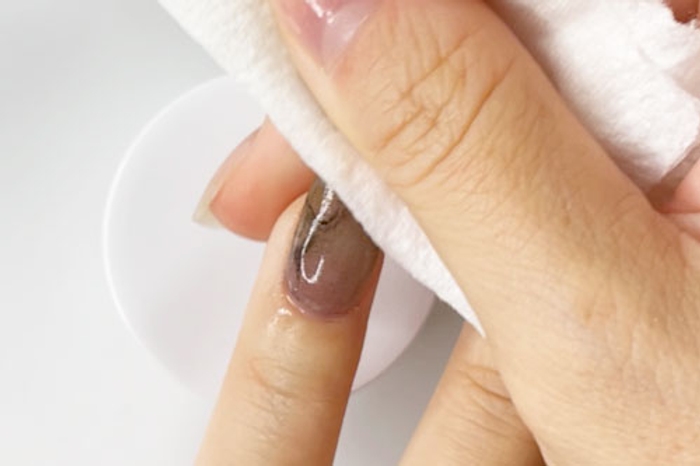
- Wash hands or use a lint free wipe saturated in alcohol to wipe the nails clean.
PRO TIP: Make sure nails are completely dry before moving to the next step!
Step 15
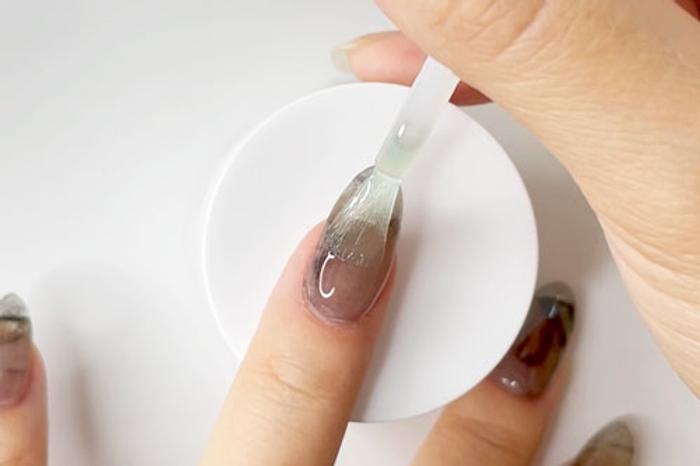
- Apply a coat of Step 4 Sealer and allow 2-3 minutes for nails to dry.
Step 16
- Apply a second coat of Step 4 Sealer and allow 3-5 minutes for nails to dry.
PRO TIP: Don't apply more than 2 consecutive coats of Sealer as this will prevent even drying & may result in a gummy mani.
Finish!
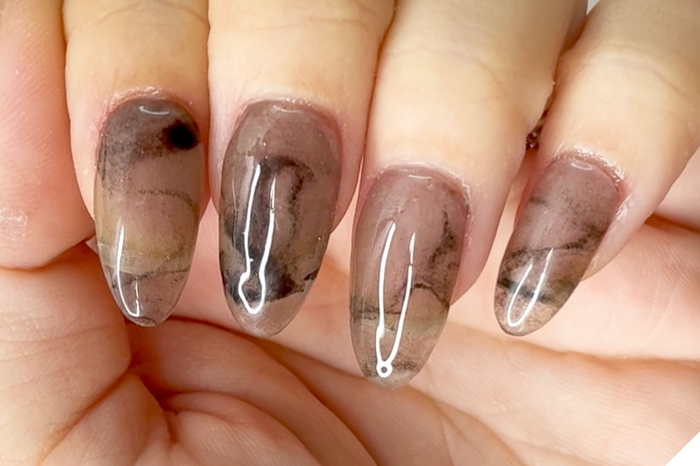
- Get smoke effect nails with this dip nail tutorial. A coat of our gray Jelly dip powder layers beautifully with marbled black dip powder for a hazy, hot mani!
Get free tutorials, special deals every week!
Sign up for fresh nail inspo & exclusive discounts delivered right to your inbox.
By subscribing, you acknowledge our Privacy Policy.
THE BEST WAY TO START DIPPING
PICK YOUR FAVORITE COLORS AND GET ALL THE LIQUIDS YOU NEED TO CREATE YOUR OWN DIP MANIS THAT LAST 2+ WEEKS WITHOUT CHIPPING! BUILD YOUR OWN BUNDLE HERE!